Assemble the Hobie Wave


Assemble the Hobie Wave
|
|
| Home | Lessons | Rentals | How To | Forums | Videos | Texas Regattas | Bookstore | Search | Sailboats for sale |
| Sailboat Photo Gallery |
Sails |
Scam Warnings | Texas Lakes | Advertise with us | Contact | Free Sailboat Ad |
|
I went by the Sailboat Shop in Austin last Saturday and helped Chuck assemble a new 2006 Hobie Wave for Jeff and Donna. It was easier than the Getaway, I continue to be impressed with the quality and great design of the new Hobies. With a length of only 13 feet, the Hobie Wave doesn't need to be registered in Texas, but it has more room and will carry much more weight than the old Hobie 14, 400 pounds! First we slipped the rear cross beam into the port hull and slipped the strip to lace the tramp into it. |

|
|
Then the front beam and the two pieces of the tramp, and slipping the starboard hull on makes the boat start to take shape. |
|
|
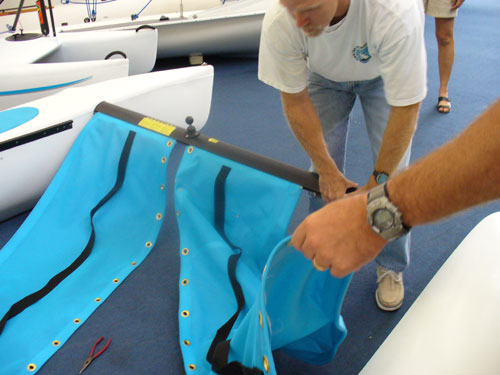
Chuck tied a temporary line to help pull the sides of the tramp into the groove for it on the side of the hull. |

|
|
Chuck ties the line with a bowline to the tramp corner, and demonstrates how to lace the tramp to the rear crossbeam using two pair of locking pliers. He ties the end neatly with alternating half-hitches.
You need the Flash plugin to see the videos, which you probably already have. Click the play button to see the video. |
|
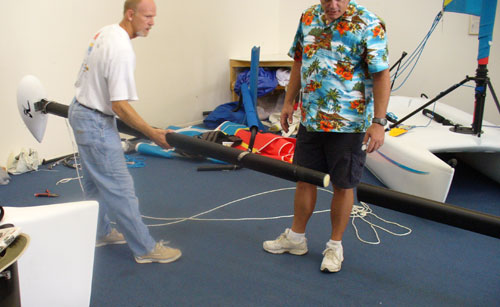
Starting at the front by tying the line to a tramp corner with a bowline, Chuck begins tensioning the line by putting his foot on the tab that the hull is held against by the tramp tension. Don't push on the hull as it that would spread the boat apart. |

|
| Chuck and Jeff team up to tighten the center line from under the tramp, again using the two pair of locking pliers. |
|
The Wave has a two piece mast, the lower section is aluminum and the upper is a composite. Jeff added the optional mast head float to prevent turtleing the boat. |
|
|
Attaching the stays and jib halyard to the mast was a simply removing the shackle pin and reinserting it in the mast. Be sure the shrouds are on the sides, with the forestay and jib halyard in the middle of the shackle. The lower end of the shrouds pin to the chainplates screwed to the hull. |

|

|
|
Next we attached the front cross brace, make sure the fittings on top have their bend to the center. |

|
|
The wings just slip into the cross beams and held with pins. |

|
|
Then step the mast, raise the sails, slip on the rudders and go sailing! |

|
The videos were taken with the Panasonic Lumix DMC-LZ2. A $200 camera designed mainly for still photography, it will take a 30 minute video with sound if you have the 1 Gig memory card, 1 1/2 hours on 10 frames/second.

|
Hobie Wave Specifications
Get your Hobie Wave at The Sailboat Shop in Austin. Call Chuck or Vic at 512 454 7171 or 888 747 8849. |